Local WordPress using Docker – Running a local WordPress development environment is crucial for testing themes and plugin before we push into staging or production environment. To run WordPress locally, we need to install and setup PHP, MySQL (or MariaDB) and WordPress which is not straightforward.
Docker provides an ideal way of setting up local WordPress development setup (for Windows you might prefer WAMP). Using simple docker commands we can quickly spin up a new environment where we can test WordPress themes and plugins. Assuming you already have setup Docker in your machine, starting WordPress is quite rapid.
Since we are running WordPress in Docker, the same setup will work in Window, Mac and Linux.
Local WordPress Setup with Docker
Let us see how to run local WordPress setup for development using Docker.
Setup Docker Compose for WordPress. Start up a command line terminal and create wp-local folder.
$ mkdir wp-local && cd wp-local
$ touch docker-compose.yml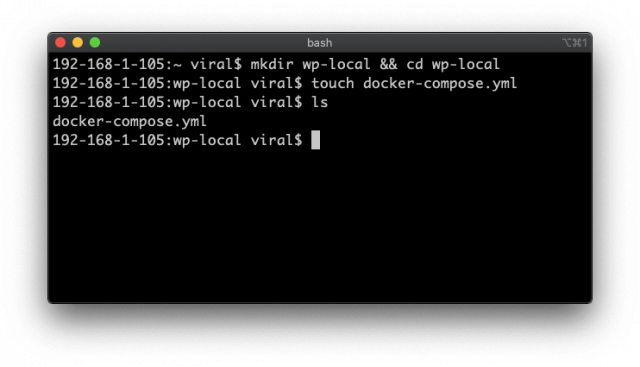
To setup WordPress + MySQL + phpMyAdmin images in the docker-compose, copy following content into it.
docker-compose.yml
version: "3"
services:
  db:
    image: mysql:5.7
    restart: always
    volumes:
      - db_data:/var/lib/mysql
    environment:
      MYSQL_ROOT_PASSWORD: password
      MYSQL_DATABASE: wordpress
      MYSQL_USER: wordpress
      MYSQL_PASSWORD: wordpress
    networks:
      - wp

  wordpress:
    depends_on:
      - db
    image: wordpress
    restart: always
    volumes:
      - ./:/var/www/html/wp-content
    environment:
      WORDPRESS_DB_HOST: db:3306
      WORDPRESS_DB_USER: wordpress
      WORDPRESS_DB_PASSWORD: wordpress
    ports:
      - 80:80
      - 443:443
    networks:
      - wp

  phpmyadmin:
    depends_on:
      - db
    image: phpmyadmin/phpmyadmin
    ports:
      - 8080:80
    environment:
      PMA_HOST: db
      MYSQL_ROOT_PASSWORD: password
    networks:
      - wp

networks:
  wp:

volumes:
  db_data:
In above docker-compose.yml file we are creating 3 containers; mysql, wordpress and phpmyadmin. The wordpress container exposing the wordpress at port 80. Similarly phpmyadmin is exposed at port 8080. Both wordpress and phpmyadmin depends on the db container which runs MySQL image.
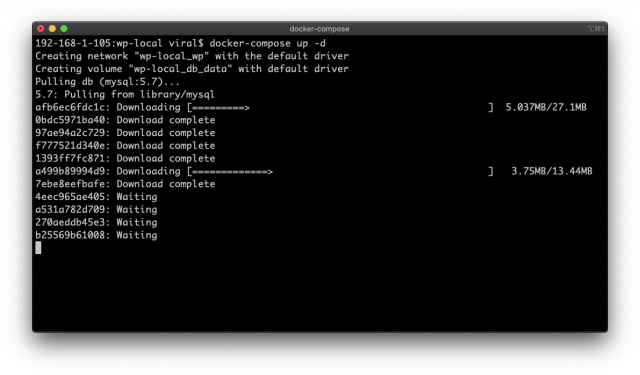
Docker Compose UP
Save the docker-compose.yml file and run docker-compose up command to create and start the docker containers with WordPress, MySQL and phpMyAdmin.
$ docker-compose up -dWhen running first time, Docker will build up the stack and download all the images. Hence it might take a while. However subsequent invocation is going to be instant.
Setup WordPress
Once the docker-compose is completed, open up the browser and goto http://localhost
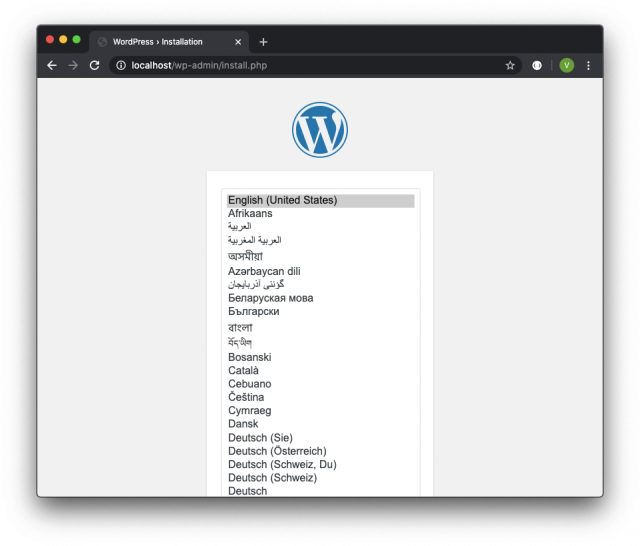
We can start the local wordpress setup. Enter Site Title, Username and Password and press Install WordPress.
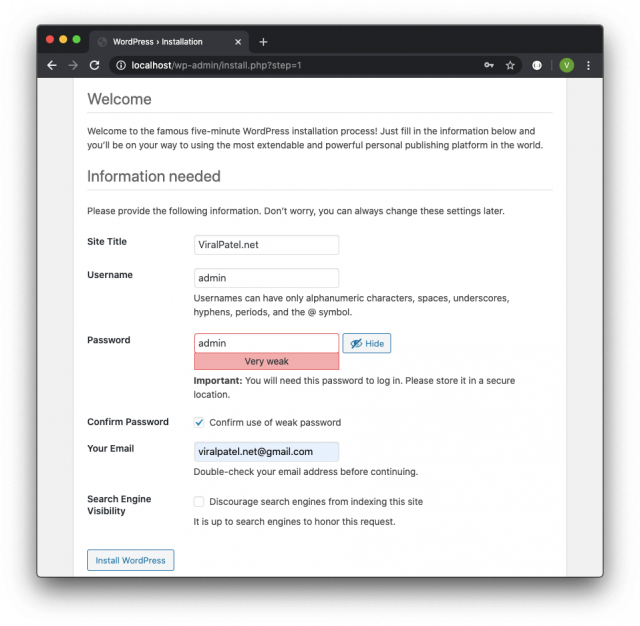
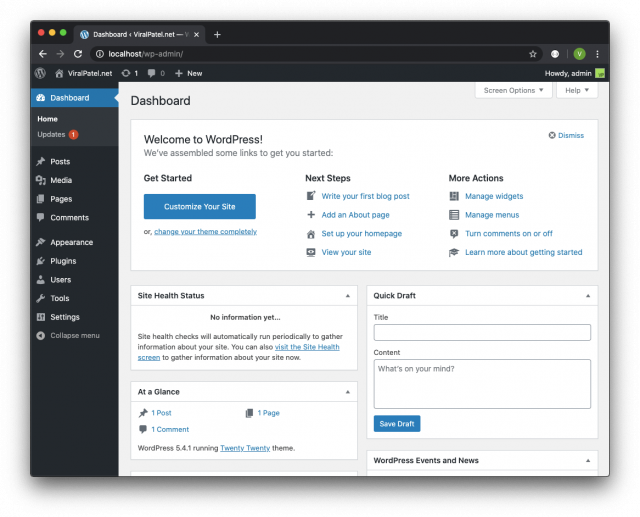
Once WordPress setup is completed, login using the username/password provided in previous step and you will be greeted with WordPress Dashboard.
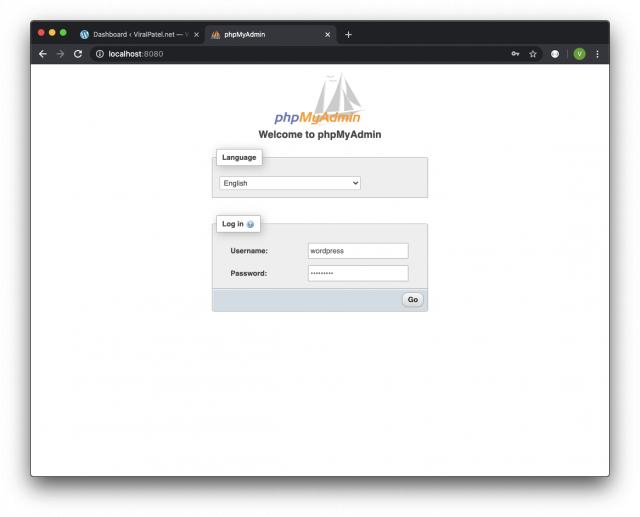
phpMyAdmin Setup
Since we also setup phpMyAdmin in our Docker compose file, login to phpMyAdmin to view/update WordPress database.
The username/password for phpMyAdmin is the value of WORDPRESS_DB_USER and WORDPRESS_DB_PASSWORD environment used in Docker compose file.
Username: wordpress
Password: wordpress
Bonus: Increase File Upload Size in Local WordPress Docker
If you are trying to import settings from existing WordPress site once you start your local WordPress docker container, you will realise the default max upload size is 2mb.
To increase the upload file size, we can specify custom php.ini file (in our case upload.ini) and setup the Docker compose file to copy it within container.
Create file upload.ini in the same folder as docker-compose.yml
$ touch upload.ini
Add following in upload.ini to change the upload_max_filesize.
upload.ini
file_uploads = On
memory_limit = 64M
upload_max_filesize = 64M
post_max_size = 64M
max_execution_time = 600
Update the docker-compose.yml file and mount the local upload.ini file.
  wordpress:
    depends_on:
      - db
    image: wordpress
    restart: always
    volumes:
      - ./:/var/www/html/wp-content
      - ./upload.ini:/usr/local/etc/php/conf.d/uploads.ini
    environment:
      WORDPRESS_DB_HOST: db:3306
      WORDPRESS_DB_USER: wordpress
      WORDPRESS_DB_PASSWORD: wordpress
    ports:
      - 80:80
      - 443:443
    networks:
      - wp
Restart the docker container by running docker-compose up -d
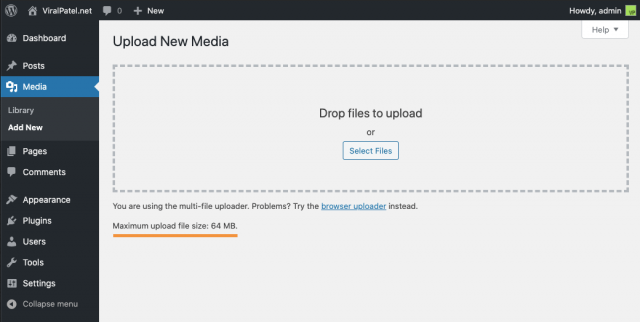
Check the max image size under Media > Add New
Source Code
The docker-compose.yml is available in Github for further update.
Github – source code
Happy WordPressing :-)


Thanks, this was a very helpful article.
One suggestion – when I tried to upload something, I get a permission error “Unable to create directory wp-content/uploads/2020/12. Is its parent directory writable by the server?”. To fix it, I did an exec into the wordpress container and ran “chmod 777 wp-content”. If this can also be incorporated into the docker-compose file, it will be much easier for others. Thank you !